- Details
- Written by: Zach Wood
- Category: Pacific Theatre
- Hits: 18

Shortly after 0600 hours, 108 Japanese fighters and bombers attacked Midway Island; quickly overwhelming the twenty-six U.S. Marine Corps fighters. Seventeen pilots were killed, and eight more on the ground were also killed in the attack. The Japanese ultimately failed in their attack, as they failed to render the runway inoperative.
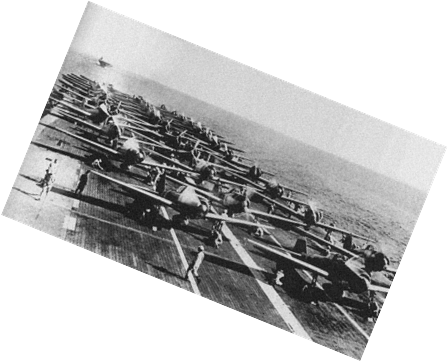
At 0656 the Enterprise, and Hornet, turned into the wind to launch their strike force of fighters, dive bombers, torpedo planes, and scouts (Yorktown did not begin launching until 0838). The main Japanese task force was sighted around 1000 hours, and a very intense fight began to unfold. The American escort fighters were tangling with high Zekes, while the American dive bombers, and torpedo planes struggled to get to target, due to complications with faulty arming switches, or Japanese fighters.
Over the course of three decisive days in June, the IJN and USN fought tooth and nail to find, and destroy each other's carriers. Many historians consdier this pivotal battle to be a turning point for the USN in the PTO. The IJN would never fully recover the experienced pilots, planes, and carriers lost at Midway. For the USN there was still a very long road ahead, which led to further naval engagements around the Solomons.
*Special Notes
This FSO will pit the United States Navy and the Imperial Japanese Navy against one another in a search for each other’s task force. The containment zone will be 100 mile grid (Four sectors). Each task force will start in the center of the containment zone, and from there, can be sailed into any direction as long as the task force stays in the containment zone. The Japanese containment zone will start with four carriers in the containment zone to represent the Japanese Task Force (three of the carriers will be jumped outside of the containment zone. If the target carrier goes down, one of the remaining carriers will be jumped back into the containment zone for recovery efforts. This carrier will be off limits to the attacking American force.) The American containment zone will start with three carriers in the containment zone to represent the American Task Force (two of the carriers will be jumped outside of the containment zone. If the target carrier goes down, one of the remaining carriers will be jumped back into the containment zone for recovery efforts. This carrier will be off limits to the attacking Japanese force.)
If a carrier, or any ship for that matter goes down during any frame, it will NOT be available during the following frames to simulate the actual loss of ships (an exception will be made for the USN if they lose their third carrier during Frame Three).
In each containment zone there will be two battleship groups, one with a battleship, and one without to represent a destroyer screen. There will also be another CV group inside the containment zone without a CV to act as a destroyer screen as well. These are optional targets AFTER an attack has been made against the enemy aircraft carrier.
Axis
Carrier Division 1, Vice Adm. Nagumo:
2 aircraft carriers:
Akagi (CV-20), Capt. Taijiro AokiAir Unit, Commander Mitsuo Fuchida:
19 Mitsubishi A6M2 Type 21 'Zeke' fighters, Lt. Cmdr. Shigeru Itaya
18 Aichi D3A1 'Val' dive bombers, Lt. Cmdr. Takehiko Chihaya
18 Nakajima B5N2 'Kate' torpedo bombers, Lt. Cmdr. Shigeharu Murata
Kaga (CV-21) Capt. Jisaku Okada
Air Unit, Lt. Cmdr. Tadashi Kusumi:
18 Mitsubishi A6M2 Type 21 'Zeke' fighters, Lt. Masao Sato
18 Aichi D3A1 'Val' dive bombers, Lt. Shoichi Ogawa
27 Nakajima B5N2 'Kate' torpedo bombers, Lt. Ichiro Kitajima
Battleship Division 3, Rear Adm. Tamotsu Takama:
Haruna, Rear Adm. Takama
Kirishima, Capt. Sanji Iwabuchi
Carrier Division 2, Rear Adm.Tamon Yamaguchi:
2 aircraft carriers:
Soryu (CV-22), Capt. Ryusaku Yanagimoto
Air Unit, Lt. Cmdr. Takashige Egusa:
18 Mitsubishi A6M2 Type 21 'Zeke' fighters, Lt. Masaharu Suganami
18 Aichi D3A1 'Val' dive bombers, Lt. Masahiro Ikeda
18 Nakajima B5N2 'Kate' torpedo bombers, Lt. Heijiro Abe
2 Yokosuka D4Y1 'Judy' dive bombers
Hiryu (CV-23), Capt. Tomeo Kaku
Air Unit, Lt. Joichi Tomonaga:
18 Mitsubishi A6M2 Type 21 'Zeke' fighters, Lt. Shigeru Mori
18 Aichi D3A1 'Val' dive bombers, Lt. Michio Kobayashi
18 Nakajima B5N2 'Kate' torpedo bombers, Lt. Kikuchi Rokuro
Cruiser Division 8 (CV-24), Rear Adm. Hiroaki Abe:
Tone, Capt. Tametsugu Okada
Chikuma, Capt. Keizo Komura
10th Destroyer Squadron, Rear Adm. Susumu Kimura in Nagara:
CL Nagara, Capt. Toshio Naoi
4th Destroyer Division (CV-25), Capt. Kōsaku Aruga
Nowaki, Cmdr. Magataro Koga
Arashi, Cmdr. Yusumasa Watanabe
Hagikaze, Cmdr. Juichi Iwagami
Maikaze, Cmdr. Seiji Nakasugi
10th Destroyer Division (CV-26), Capt. Toshio Abe:
Kazagumo, Cmdr. Masayoshi Yoshida
Yūgumo, Cmdr. Shigeo Semba
Makigumo, Cmdr. Isamu Fujita
17th Destroyer Division (CV-19), Capt. Masayuki Kitamura:
Urakaze, Cmdr. Nagayoshi Shiraishi
Isokaze, Cmdr. Shunichi Toyoshima
Tanikaze, Cmdr. Motoi Katsumi
Hamakaze, Cmdr. Tsuneo Orita
*CV-24 will have no CV, only the cruisers and destroyers. Can be used as a crusier screen, but must stay in the containment zone.
*CV-25 will have no CV, and no cruiser, only destroyers. Can be used as a destroyer screen, but must stay in the containment zone.
*CV-26 will have no CV, and no cruiser, only destroyers. Can be used as a destroyer screen, but must stay in the containment zone.
*CV-18 will have no CV, and no cruiser, only destroyers. Can be used as a destroyer screen, but must stay in the containment zone.
*CV-19 will have no CV, and no cruiser, only destroyers. Can be used as a destroyer screen, but must stay in the containment zone.
Allies
Task Force 16, Rear Admiral Raymond A. Spruance
Task Group 16.5
Enterprise (CV-16), Capt. George D. Murray
Enterprise Air Group Lt. Cmdr. C. Wade McClusky:
27 F4F-4 fighters, VF-6 – Lt. James S. Gray
19 SBD-2/3 dive bombers, VB-6 – Lt. Richard H. Best
19 SBD-2/3 dive bombers, VS-6 – Lt. Wilmer E. Gallaher
14 TBD-1 torpedo bombers, VT-6 – Lt. Cmdr. Eugene E. Lindsey
Hornet (CV-12), Capt. Marc A. Mitscher
Hornet Air Group, Cmdr. Stanhope C. Ring:
27 F4F-4 fighters, VF-8 – Lt. Cmdr. Samuel G. Mitchell
19 SBD-2/3 dive bombers, VB-8 – Lt. Cmdr. Robert R. Johnson
18 SBD-1/2/3 dive bombers, VS-8 – Lt. Cmdr. Walter F. Rodee
15 TBD-1 torpedo bombers, VT-8 – Lt. Cmdr. John C. Waldron
Task Group 16.2 (CV-9), Cruisers, Rear Admiral Thomas C. Kinkaid
Pensacola, Capt. Frank L. Lowe
Northampton, Capt. William W. Chandler
Vincennes, Capt. Frederick L. Riefkhol.
Minneapolis, Capt. Frank J. Lowry
New Orleans, Capt. Walter S. De Lany
Atlanta, Capt. Samuel P. Jenkins
Task Group 16.4, Destroyer Screen, Capt. Alexander R. Early
Destroyer Squadron 1 (CV-10):
USS Phelps, Lt. Cmdr. Edward L. Beck
USS Worden, Lt. Cmdr. William G. Pogue
USS Monaghan, Lt. Cmdr. William P. Burford
USS Aylwin, Lt. Cmdr. George R. Phelan
Destroyer Squadron 6 (CV-11):
USS Balch, Lt. Cmdr. Harold H. Thiemroth
USS Conyngham, Lt. Cmdr. Henry C. Daniel
USS Benham, Lt. Cmdr. Joseph M. Worthington
USS Ellet, Lt. Cmdr. Francis H. Gardner
USS Maury, Lt. Cmdr. Gelzer L. Sims
Task Force 17, Rear Admiral Frank J. Fletcher
Task Group 17.5
Yorktown (CV-15), Capt. Elliott Buckmaster
Yorktown Air Group, Lieutenant Commander Oscar Pederson:
25 Grumman F4F-4 Wildcat fighters, VF-3 – Lt. Cmdr. John S. Thach
18 Douglas SBD-3 Dauntless dive bombers, VB-3 – Lt. Cmdr. Maxwell F. Leslie
19 Douglas SBD-3 Dauntless dive bombers, VS-5 – Lt. Wallace C. Short, Jr.
13 Douglas TBD-1 Devastator torpedo bombers, VT-3 – Lt. Cmdr. Lance E. Massey
Task Group 17.2, Cruisers (CV-13), Rear Admiral William W. Smith
Astoria, Capt. Francis W. Scanland
Portland, Capt. Lawrence T. Du Bose
Task Group 17.4, Destroyer Screen (CV-14), Capt. Gilbert Hoover
USS Hammann, Commander Arnold E. True
USS Anderson, Lt. Cmdr. William M. Hobby, Jr.
USS Gwin, Lt. Cmdr. J. M. Higgins
USS Hughes, Lt. Cmdr. Donald J. Ramsey
USS Morris, Cmdr. Harry B. Jarrett
USS Russell, Lt. Cmdr. J. C. Pollock
*CV-9 will have no CV, only the cruisers and destroyers. Can be used as a crusier screen, but must stay in the containment zone.
*CV-13 will have no CV, only the cruisers and destroyers. Can be used as a crusier screen, but must stay in the containment zone.
*CV-10 will have no CV, and no cruiser, only destroyers. Can be used as a destroyer screen, but must stay in the containment zone.
Side Split
Axis 50%
Allies 50%
Planeset
Axis
Mitsubishi A6M2 Unlimited (Skins: Akagi Air Group, Hiryu Air Group)
Aichi D3A1 (12) Min (Skins: Soryu Air Group)
Nakajima B5N2 (12) Min (Skins: Hiryu Air Group)
Allied
Grumman F4F-4 Unlimited (Skins: VF-3, VF-6)
Dauntless SBD-5 (12) Min (VS-5, VB-6,)
Nakajima B5N2(Sub for TBD) (12) Min (USN is default skin)
Ordnance Distribution (Loadouts)
Axis
Aichi D3A1 - 1x 250kg bomb, 2x 50kg bombs
Nakajima B5N2 - 1x 800kg torpedo.
Allies
Grumman F4F-4 - 4x .50 Cal. or 6x .50 Cal.
Dauntless SBD-5 – 1x 500lb bomb and 2x 100lb bombs
Nakajima B5N2 (Sub for TBD) - 1x 800kg torpedo.
Terrain
Midway
Special Event Rules and Ordnance Restrictions
- This is a one life event. Pilots may not re-plane at their home airfields.
- Ordnance for each aircraft will be set by the setup CM in the hangar.
- All assaults must be made by no less than 12 attacking aircraft.
- All destroyed objects stay down for the entire FSO.
- Altitude CAP for all 22,000 feet.
Arena Settings
•Terrainmap: Midway
•Fuel burn rate: 1.0
•Anti-aircraft gun strength: 0.4
•Bombsight calibration: AUTOMATIC (MA standard)
•Icons: 3.0K yards (9,000 feet)
•Sector Radar ("bar dar"): OFF
•Dot Radar: OFF
•Fighter and Bomber warning range: 42,000 feet
•Tower range set to 42,000 feet (for display only, to match the above setting)
•Haze range: 8 miles
•Friendlycollisions: OFF
•Enemy collisions: ON
•Kill shooter: OFF
•Stall Limiter: Set ON (Players may disable)
Scoring
Single Engine Fighter - 5 pts
Single Engine Torpedo - 10 pts
Single Engine Dive Bomber - 15 pts
Carrier: 125 pts
Battleship: 100 pts
Cruiser: 75 pts
Destroyer: 50 pts
Wind
Altitude Speed Direction
00 - 02K 0 NO WIND
02 - 10K 05 W -> E
10 - 18K 13 N -> S
18 - 26K 27 E -> W
26 - 30K 38 S-> N
Arena Clock
Frame 1 0700 (7:00 AM, Morning)
Frame 2 1200 (12:00 PM, Midday)
Frame 3 1600 (4:00 PM, Afternoon)
Sources
http://www.midway1942.com/index.shtml
Kleiss, N. Jack, Never Call Me A Hero: A Legendary American Dive-Bomber Pilot Remembers The Battle of Midway
Special Shoutout to Greebo for making Midway era skins to be used for this setup. Definitelymeans a lot! <S>
- Details
- Written by: Spikes
- Category: Pacific Theatre
- Hits: 17
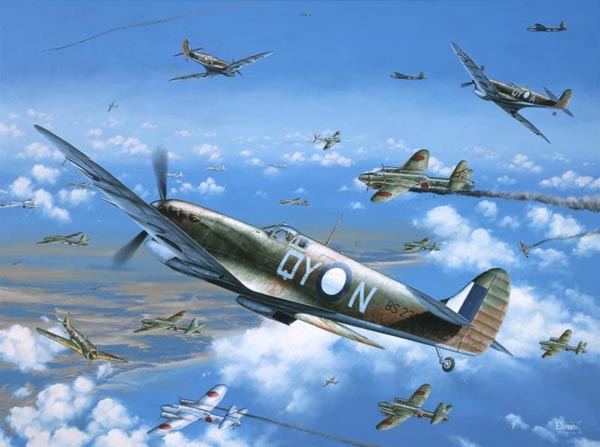
HOLDING THE LINE: Australia 1942-43
With the surrender of Malaya and the Dutch East Indies in March 1942 Japan had most of it's southern planned East Asian-Co-Prosperity Sphere secured. The Phillipines fell shortly afterwards and Australians beleived an invasion of their homeland was only a matter of time. The first large scale air raid on Darwin had occured on 19th February by carrier arcraft from Soryu, Hiryu, Akagi and Kaga along with land based planes of the IJNAF. Darwin and its port had become a crucial relay point for Allied troops, aircraft, navy, and shipping and became a main target for the Japanese. After the carrier raid the Japanese moved in more IJNAF and IJAAF land based bombers and fighters to continue the campaign.
The Australians were aware of their vulnerable strategic position. They had only obsolete fighters at the time and much of their army and navy were overseas. A plea was sent out to Prime Minister Winston Churchill from the Australian government to send the British based RAAF fighter squadrons home equipped with Spitfires to defend Darwin. Churchill agreed but it would take some time to make it a reality. The Australians would also receive assistance from the USA. P-40s were shipped to Australia for the RAAF but like the Spitfires en route from Britain it would take time. In the meantime the USAAF 49th FG that had originaly come to Australia to stem the Japanese on Java would defend Darwin instead until it could be relieved by the RAAF. From March until September 1942 they would be the only air defence in the region.
In August 1942 the P-40 equipped No.77 Squadron RAAF took over air defence of Darwin and the 49th FG was moved to New Guinea. The veteran No.76 Squadron RAAF already equipped with P-40s returned from Milne Bay in October. By January 1943 the Spitfire equipped No.1 Fighter Wing RAAF comprising No. 79, No.452 and No.79 Squadrons were based near Darwin.
The raids by the Japanese continued until November 1943. A total of 100 raids were made during that time over the Northern Territory of Australia. The USAAF 49th FG and No.1 Fighter Wing RAAF bore the brunt of these raids. In the end the Japanese defeat at Coral sea and Midway and the reversals they suffered at Gualdacanal and New Guinea all but ended any serious Japanese presence in the South West Pacific by 1944. Never again did the forces of Imperial Japan come so close to Australian shores.
This FSO recreates the air battles over Northern Australia 1942-43.
Country Percentages:
Axis 55%
Allied 45%
Field Assignments:
Axis Bishop
Allied Knight
CM Rook
OOB:
Axis (IJN/IJAAF):
Frame 1
A6M2
Ki-43-I (Ki-43-II) (max 24)
G4M1
Frames 2 and 3
A6M3
Ki-43-II (max 24)
G4M1
Allied (USAAF/RAAF):
Frame 1
P-40E
Frames 2 and 3
Spitfire V
Special Rules and Ordnance Restrictions:
* All fighters have air-ground ordnance disabled.
* Drop tanks are disabled.
* All aircraft types must be used by a minimum of 12 *players*.
* ALL AIRCRAFT ARE TO BE LANDED AND THE PLAYERS TOWERED OUT BY FRAME END OR WILL BE CONSIDERED SHOT DOWN AND THE CREWS KIA.
Scoring:
Aircraft Pts
-----------
G4M1 = 10 pts
All Other Aircraft = 5 pts
Target Pts
----------
Gun = 1 pt
Hangar = 25 pts
Cruiser = 100 pts
Destroyer = 50 pts
All Other = 3 pts
Survival Pts
----------
Landing = 2 pts
Pilot Survival = 2 pts
Arena Settings:
- Morocco terrain
- Fuel burn 1.0
- Icons friendly 3k/enemy 3k
- 0.3 Ack
- Fighter and Bomber warning range 42,000 (about 8 miles)
- Tower range set to 42,000 (for display only to match the above setting)
- Haze/fog full visibility (17 miles)
- Radar off
- Enemy collisions on
- Friendly collisions off
- Killshooter off
- Time: 15:00 ( 3PM ) Game Clock
- Formations: On
- Formation Autopilot: On
- Bomber calibration: Automatic
- Wind: 0K-10K W TO E - Speed 10
10K-18K W TO E - Speed 5
18K+ NW TO SW - Speed 15
Designer's Notes:
* The Ki-43-I is represented by the Ki-43-II.
* Drop tanks are assumed to have been used up en route.
Design by Warloc
- Details
- Written by: Spikes
- Category: Pacific Theatre
- Hits: 23
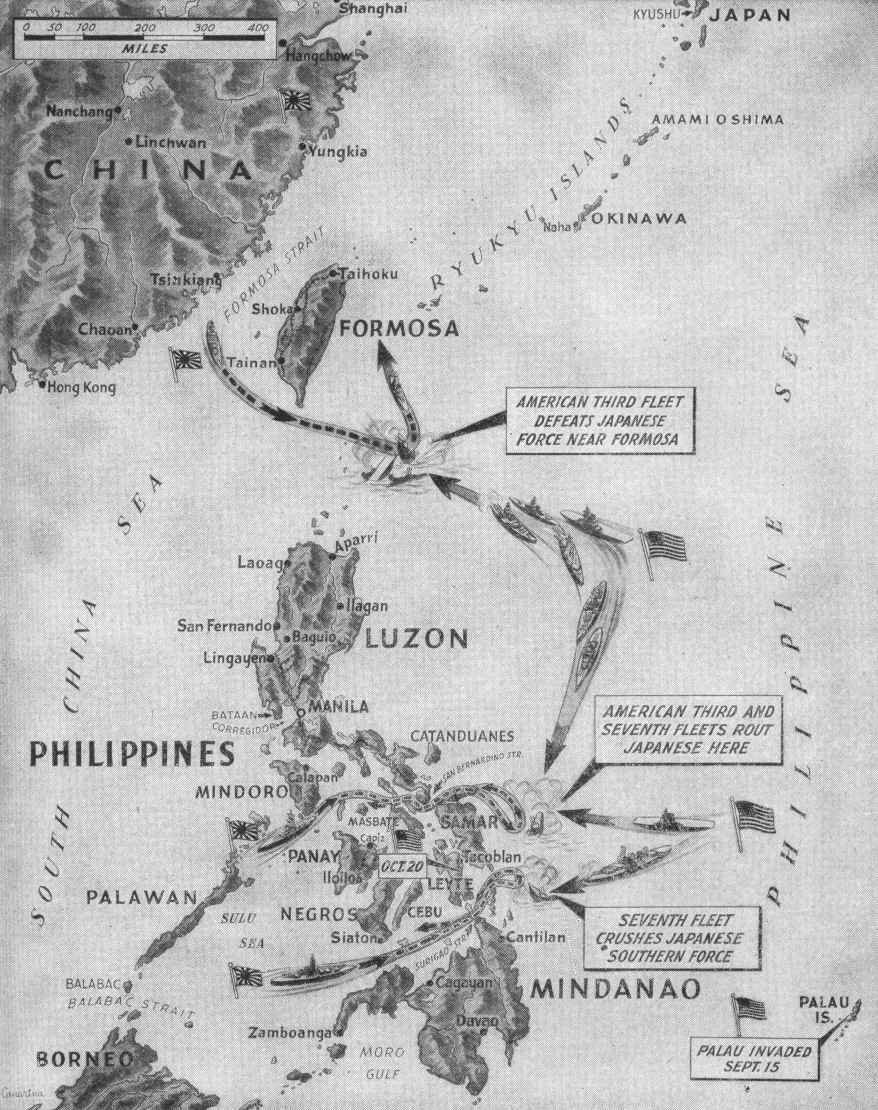
October 1944, Task Force 38 is full steam ahead for the Japanese home islands in preparation to launch air strikes against the Nansei Islands (Ryukyu), Formosa, and Luzon. While the Japanese are preparing, and planning for a decisive battle on Luzon, Task Force 38, under the command of Admiral Halsey, launches an attack on the Nansei Island chain.
With the unexpected attack this drastically changes Japanese plans for Luzon. Under the command of Admiral Toyoda, the Japanese realize that an opportunity has presented itself to deal a crippling blow to the US Third Fleet, one that had not been achieved since Pearl Harbor. Under Toyoda's orders all available Japanese aircraft in the area were ordered to stand by for an attack on the American Third Fleet. In total, Toyoda had roughly 1,400 Japanese Army and Navy fighter, and bombers at his disposal.
Halsey's Task Group included:
Task Group 38.1 (TG 38.1): USS Cowpens, USS Hornet, USS Monterey, USS Wasp
Task Group 38.2 (TG 38.2): USS Bunker Hill, USS Cabot (detached) USS Hancock, USS Independence,USS Intrepid
Task Group 38.3 (TG 38.3): USS Essex, USS Langley, USS Lexington, USS Princeton
Task Group 38.4 (TG 38.4): USS Belleau Wood, USS Enterprise, USS Franklin, USS San Jacinto
As well as six battleships, four heavy cruisers, eleven light cruisers and fifty seven destroyers.
The battle would range from October 10th-20th, with some of the fighting taking place in the middle of a Typhoon. With the Japanese attacking almost daily, and flying multiple sorties against the constantly moving American fleet, navy fighters had a field day against the Japanese claiming over 500 destroyed in the ten days of operation. The Japanese would claim,”
Sunk: 11 carriers, 2 battleships, 3 cruisers, 1 destroyer (or light cruiser).
Damaged: 8 carriers, 2 battleships, 4 cruisers, 1 destroyer (or light cruiser), 13 unidentified ships. In addition, at least 12 other ships set afire. (Formosa Air Battle, Page 362, Reports of General MacArthur)"
With more reports coming in from different Japanese pilots, claiming to have seen the Third Fleet burning, the high command started to believe they actually had dealt a crippling blow to American Naval, and Air Power in the pacific. In reality, very few American ships were damaged at the cost of 312 Japanese planes lost (Formosa Air Battle, Page 363). With the loss of 300 plus aircraft and their crew, would greatly effect Japanese operations around Formosa, Luzon, and the Okinawa area. The Japanese were in the process of celebrating their reported Victory, believing they had destroyed the Third Fleet; which would halt the invasion of the Philippines. Alas, reality set in on October 20th, when Japanese High Command received word that an American Invasion fleet had landed on Leyte.
Country Percentages:
Axis 50%
Allied 50%
OOB:
Axis (IJN/IJAAF) Axis Field Assignments (ALL IJN/IJAAF are available)
A17, A18, A19, A22, A90, A91
Ki-84 (max of 40)
Ki-61 (Max of 20)
A6M5b (Min of 12)
Ki-67 (min of 12 players)
Allied (USN) Allied Field Assignments (ALL USN aircraft are available):
F4U-1D (Max of 20) C73 USS Cowpens
F6F-5 (Max of 40) C74 USS Bunker Hill
TBM-3 (Min of 12) C75 USS Intrepid
FM2 (Min of 12) C76 USS Essex
C77 USS Enterprise
C78 USS San Jacinto
Special Rules and Ordnance Restrictions:
* Formations are enabled (but not required) for all bombers permitted to use them.
All American aircraft have the 1000lb bomb disabled.
Scoring:
Aircraft Pts
------------
Twin engined aircraft = 15 Pts
TBM/ = 20 pts
Fighter = 5 pts
Ground Target Pts
-----------------
Gun = 1 pt
Ammo Bunker = 3 pts
Barracks = 3 pts
Radar = 3 pts
Vehicle Hangar = 25 pts
Fighter Hangar = 25pts
Bomber Hangar = 25 pts
Destroyer = 50 pts
Cruiser = 100 pts
Battleship= 150 pts
Carrier = 200 pts
Arena Settings:
- Luzon terrain
- Fuel burn 1.0
- Icons friendly 3k/enemy 3k
- 0.3 Ack
- Fighter and Bomber warning range 42,000 (about 8 miles)
- Tower range set to 42,000 (for display only to match the above setting)
- Haze/fog full visibility (8 miles)
-Clouds scattered
- Radar off
- Enemy collisions on
- Friendly collisions off
- Killshooter off
- Time: 15:00 ( 3PM ) Game Clock
- Formations: On
- Bomber calibration: Automatic (MA Standard)
- Wind: 0-10K NW TO SE - Speed 5
10K-18K W TO E - Speed 10
18K-20K N to S- Speed 15
20K Downdraft
Designer's Notes:
This FSO is designed to follow the air battles that took place over Formosa (Taiwan). Until the terrain becomes available, the Luzon Terrain will be substituted.
Sources used:
Leyte, June 1944 – January 1945, https://books.google.com/booksid=9AR7jpjL1TsC&pg=PA86&lpg=PA86&dq=battle+for+formosa&source=bl&ots=cqL5ooBrZv&sig=cYZ6Z_nw2nKO4BUPHFT0DOfDss0&hl=en&sa=X&ved=0ahUKEwjikIrWwuTYAhVmluAKHUeSAIgQ6AEIXDAI#v=onepage&q=battle%20for%20formosa&f=false
MacArthur’s Reports, https://history.army.mil/books/wwii/MacArthur%20Reports/MacArthur%20V2%20P1/ch12.htm
- Details
- Written by: Spikes
- Category: Pacific Theatre
- Hits: 19
Introduction
The Battle of the Philippines Sea, also known as “The Great Marianas Turkey Shoot” by American pilots, was the Japanese Navy’s final attempt to hold the Marianas Island chain in the South Pacific during 1944. It was also the fifth and final large-scale carrier to carrier battle of the surface and air war in the South Pacific. The Japanese began the battle outnumbered and in desperate need of a victory. The Japanese forces were outnumbered by well over 200 hundred aircraft. In addition to the Americans overwhelming numbers of aircraft, the Americans fielded 7 fleet carriers and 8 light carriers, while the IJN could only muster 5 fleet carriers and 4 light carriers.
The final result of the battle yielded great losses for Japanese Naval and Army Air forces and placed the Americans in a firm position to be unchallenged at sea for the remainder of the conflict.
Join the Aces High CM Team as we recreate the hot South Pacific air action in Marianas Madness.
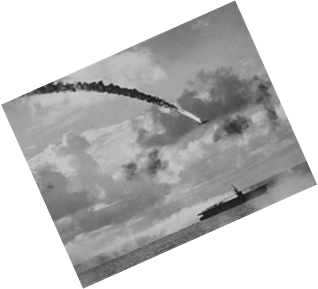
Country Percentage
Axis 50%
Allies 50%
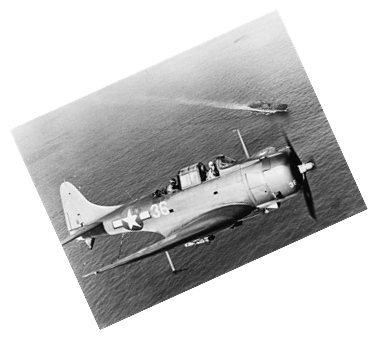
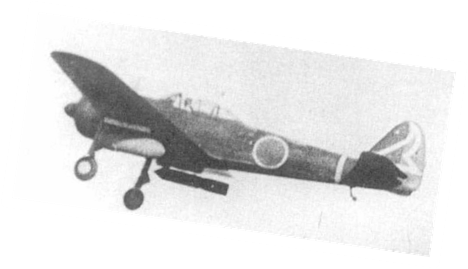
Event Planeset
|
Axis |
Min/Max |
Base |
Allies |
Min/Max |
Base |
|
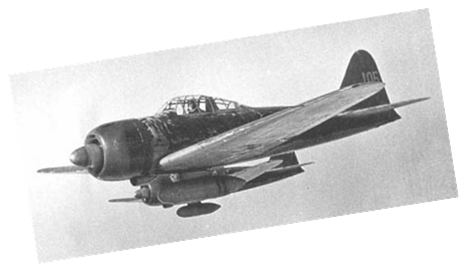
A6M5b |
Unlimited |
ABC |
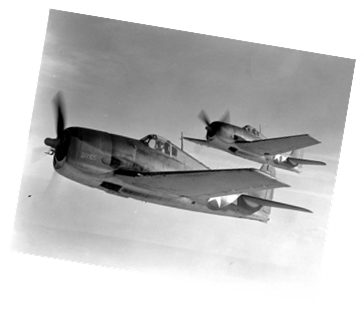
F6F-5 |
Unlimited |
TG 58 |
|
Ki-43 (Dive Bombers) |
Min 8 |
ABC |
SBD-5 |
Min 8 |
TG 58 |
|
Ki-67 (No formations) |
Min 8 |
A17 |
TBM-3 |
Min 8 |
TG 58 |
|
Ki-61 |
Min 16 |
A16 |
FM-2 | Min 16 | TG 58 |
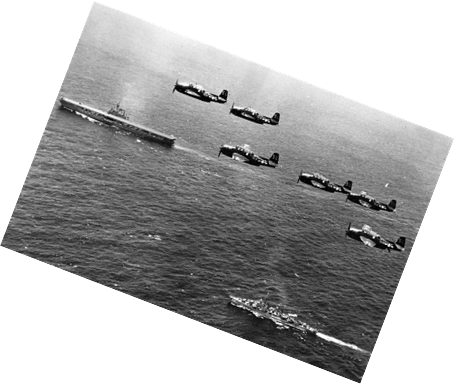
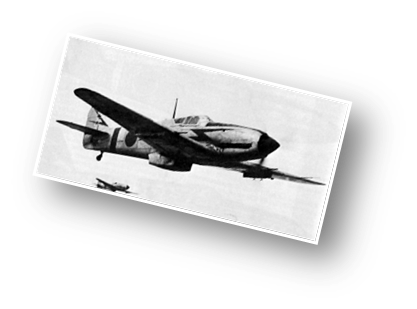
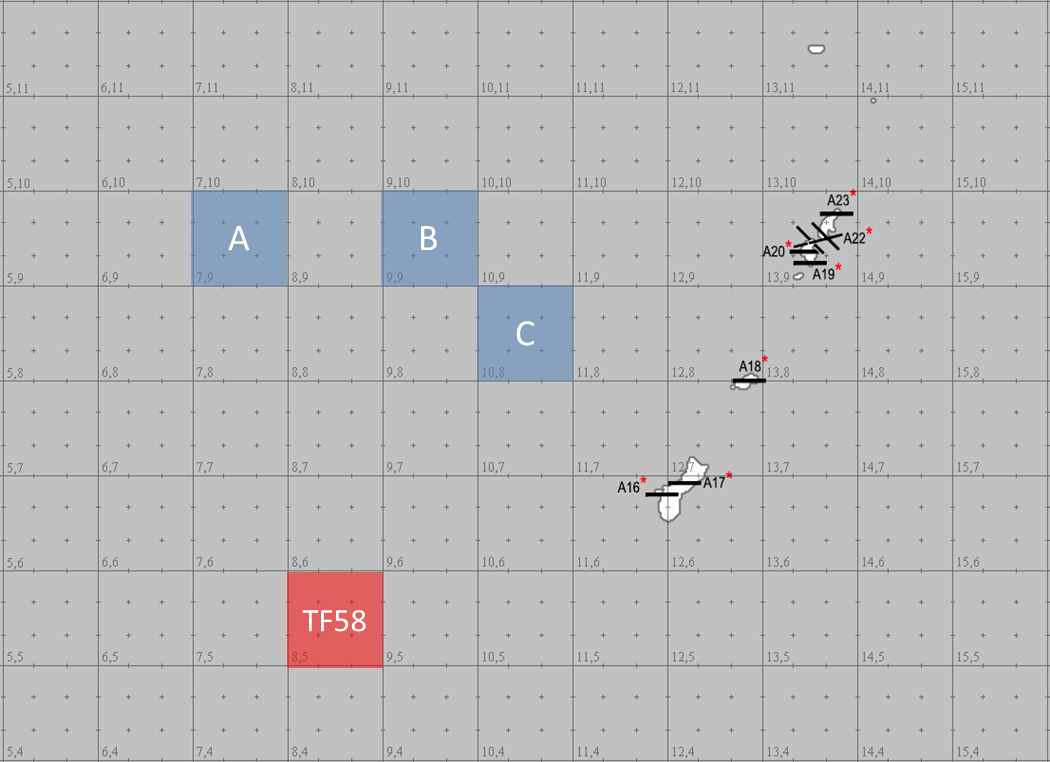
Possible Target Types:
CV – Aircraft Carriers
CA – Cruiser
DD – Destroyer
VH – Vehicle Hangar
BH – Bomber Hangar
FH – Fighter Hangar
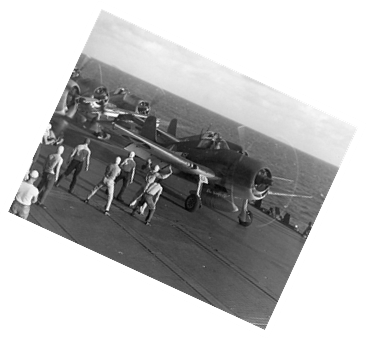
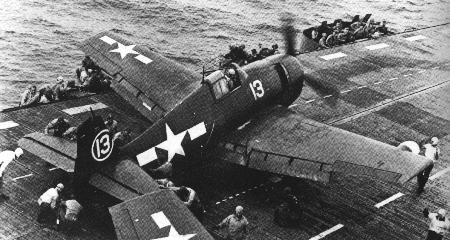
Aircraft Ordnance:
Axis:
Ki-67 – 1x 800 Kg Type 1 Torpedo or 3x 250 Kg bombs
Ki-43 Dive Bomber - 2x 250 Kg bombs
Allies:
SBD-5 – 1x 1000 lb. bomb
TBM-3 – 1x 2000 lb. Mk 13 Torpedo or 4x 500 lb. bombs
Special Event Rules and Restrictions
- This is a one life event. Pilots may not re-plane at their home airfields.
- Ordnance for each aircraft will be set by the host CM in the hangar.
- Aircraft may rearm and refuel at any friendly non-neutral airfield or ship.
- All Ki-43s are stand-in aircraft for the D3N1 dive bomber. These aircraft are not considered fighters. These aircraft must carry their ordnance to target and attack or die trying. Only after an attack has been made with the Ki-43 may these aircraft fly other operations.
- The Ki-67 level bomber with formations set off, are restricted to an altitude 15K and below.
- The Ki-67 may not dive bomb.
- The TBM-3 may be used as a dive bomber.
- The attack before T+60 rule must be complied with under penalty of non-compliance.
- Secondary missions to achieve primary objectives are allowed.
- Neither side will have the option to steer their fleets.
- All ships will have a sink weight of 2,000 lbs.
- Hangars will have the same destruction weight as the shipping 2,000 lbs.
- An aircraft designated as a fighter, may not strafe down a hangar or ship. Ships and hangars destroyed by A6Ms, Ki-61s, F6Fs or FM-2s will not be scored.
- All aircraft must be landed by the end of hostilities or those aircraft will be counted as destroyed for the opposing side.
Event Scoring
*Note: The maximum hard target point score for each side is up to 6 hangars or ships. If both sides achieve up to this level, the winner will be decided by the number of aircraft shot down.
Allied Targets
Hangars 10 pts (A small base has 6 available hangars to attack.)
Ships 10 pts (Fleets are constructed of 6 ships within each fleet.)
Opposing aircraft destroyed – 1 pt.
Axis Targets
Ships 10 pts
Opposing aircraft destroyed – 1 pt.
Arena Settings
- Terrain map: Marianas
- Fuel burn rate: 1.0
- Anti-aircraft gun strength: 0.2
- Bombsight calibration: AUTOMATIC (MA standard)
- Icons: 3.0K yards (9,000 feet)
- Sector Radar ("bar dar"): OFF
- Dot Radar: OFF
- Fighter and Bomber warning range: 36,960 feet (7 miles)
- Tower range set to 36,960 feet (for display only, to match the above setting)
- Haze range: 15 miles
- Friendly collisions: OFF
- Enemy collisions: ON
- Kill shooter: OFF
- Stall Limiter: Set ON (Players may disable)
Wind:
Altitude Speed Direction
00 - 02K 0 NO WIND
02 - 10K 05 SW -> NE
10 - 18K 13 SW -> NE
18 - 26K 27 SW -> NE
26 - 30K ▲ 38 DOWNDRAFT ▼
Arena Clock:
Frame 1 06:30 (6:30 AM, Morning)
Frame 2 09:00 (9:00 AM, Morning)
Frame 3 17:00 (5:00 PM, Evening)
Designer – AKWarHwk October 2017
Designer Notes:

- Details
- Written by: Spikes
- Category: Pacific Theatre
- Hits: 16
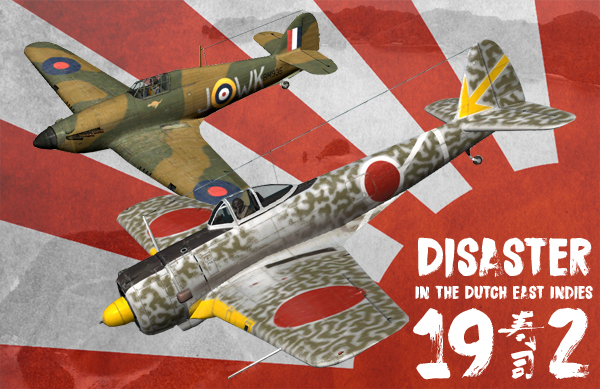
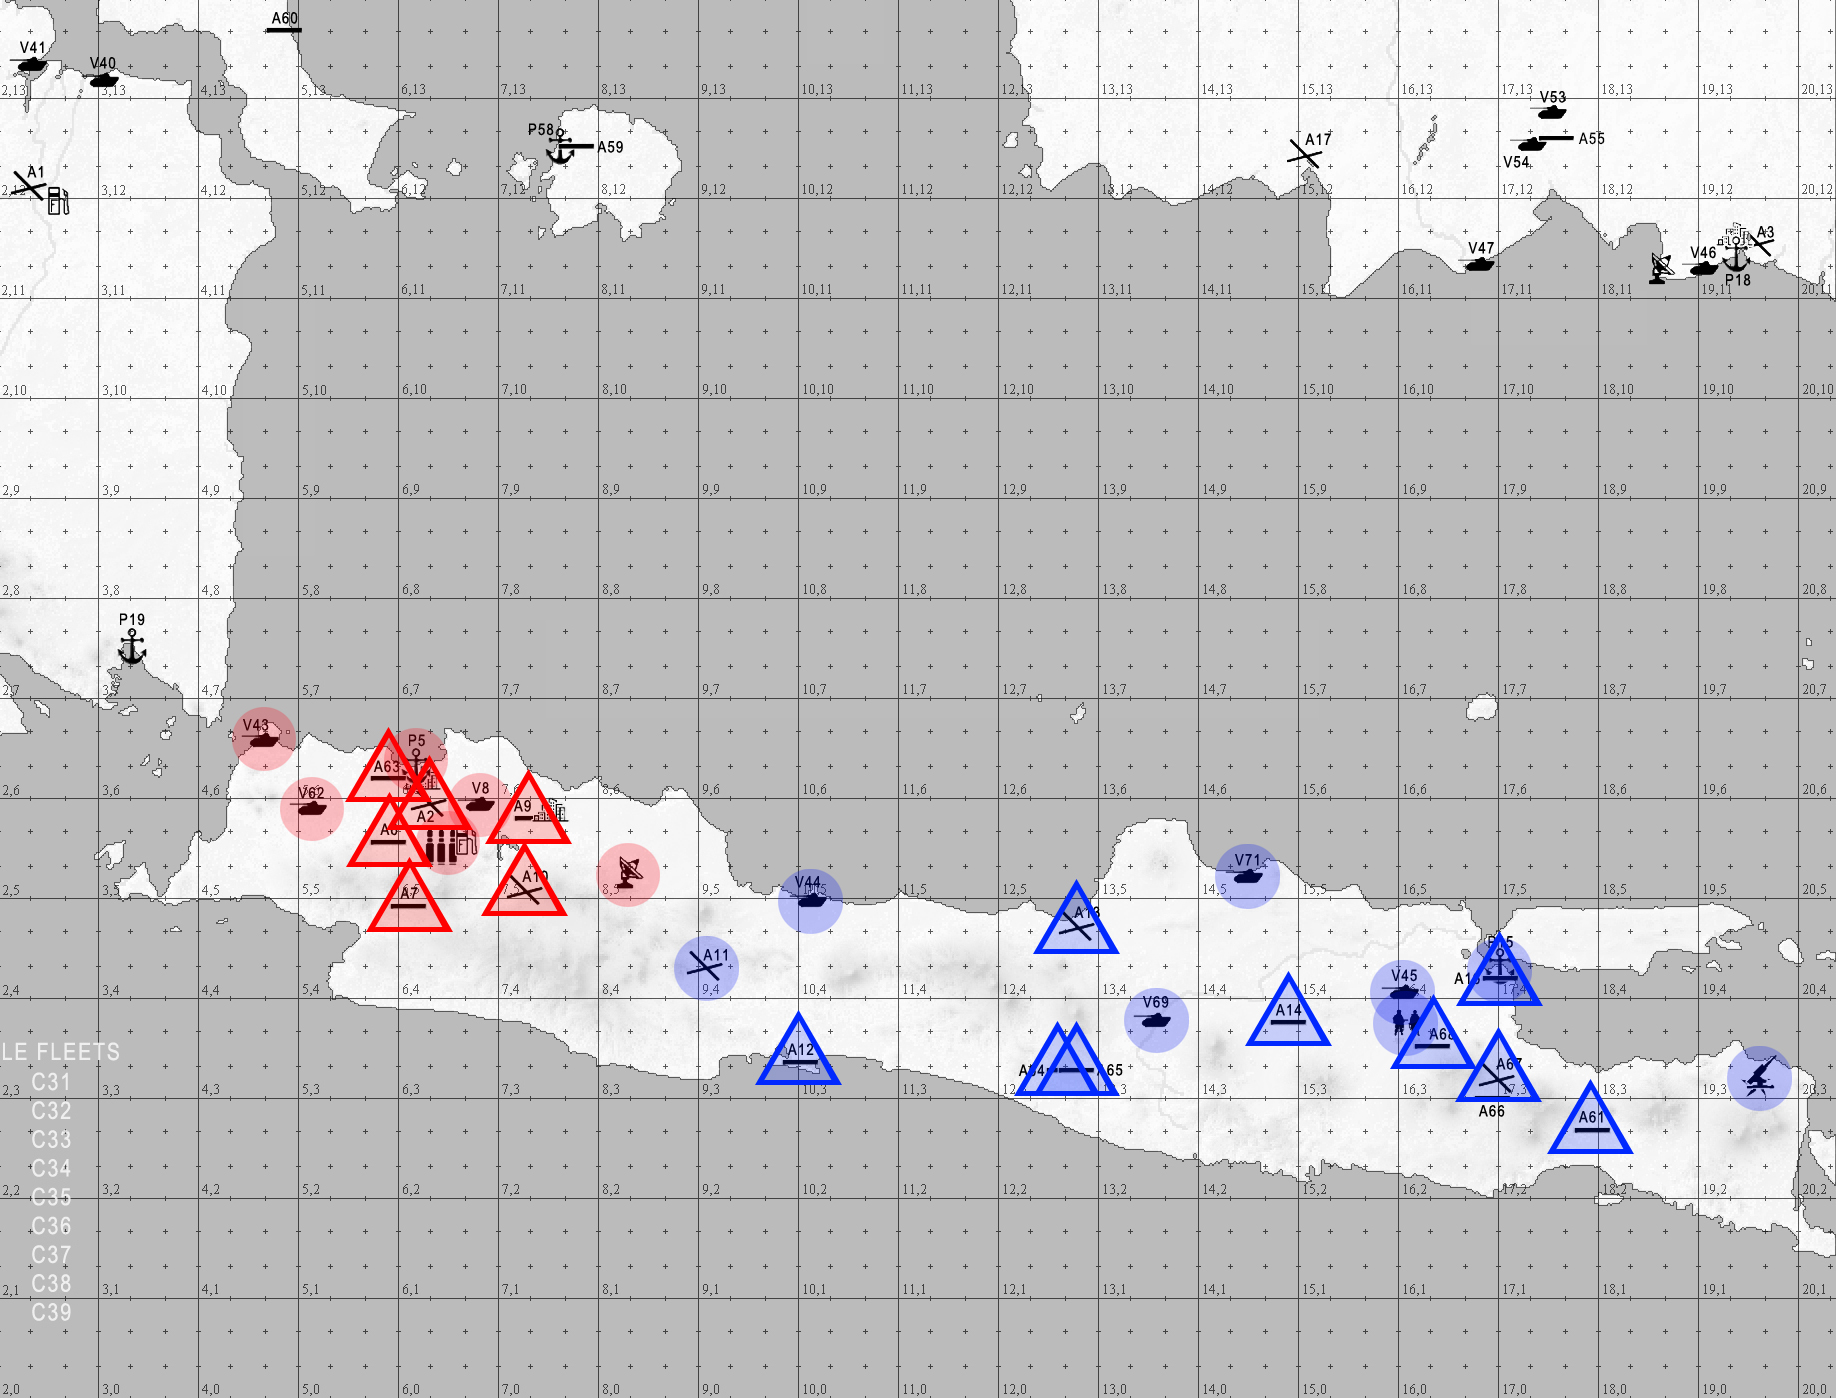
The Japanese advance down the Malayan peninsula and the capture of Singapore along with 130,000 Allied troops on February 15th was a stinging Allied defeat only a few months into the Pacific war, but there was no time to sit and dwell on the failure. The day before the surrender of Singapore, the Japanese had landed in Sumatra at Palembang, capturing the main airfield and securing the oil refineries using airborne troops. The British, Commonwealth, and Dutch forces were again retreating, this time to Java. ABDA (American, British, Dutch and Australian) forces were now going to make a last stand effort to protect the island from Japanese capture.
On January 29th, a small number of USAAC P-40E’s of the 17th Pursuit Squadron landed in Java to help bolster the British, Dutch, New Zealand and Australian forces flying mostly Brewster Buffalos and Hawker Hurricane IIs. The Japanese Army was now mainly flying the new Ki-43 and the Japanese Navy was now operating off Java with the superior A6M2. Fighting was tough going for the Allies, often outnumbered, they still managed produce ace pilots across all the countries serving on Java. Major naval battles occurred in the Java Sea and Sunda Strait on February 27th and 28th and ABDA forces lost several warships destroying any major naval presence they once had.
With no naval force to stop the convoys of Japanese troops, the Japanese began the Invasion of Java on February 28th with a landing of the Western side of the island. 2 more landings would occur on March 1st, one of them on the Eastern side of Java just 50 miles West of Surabaya. The Allies made valiant attempts to stop the invasion but by now were running out of aircraft and pilots. The US pilots handed their few remaining aircraft over to the Dutch and were evacuated back to Australia. Dutch forces would surrender Java to the Japanese on March 8th and they would continue to fight on Sumatra until March 28th.
This FSO is set during those last few days on Java, early March 1942.
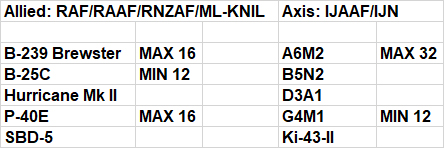
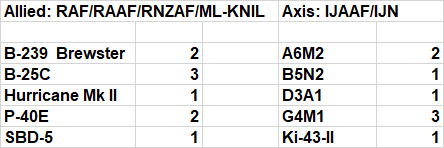
PLANE SET
*SPECIAL RULES*
- Only aircraft with minimums (MIN) listed are required.
- Bombs disabled for Hurricane II, P-40E, A6M2, and Ki-43-II
- 4x 20mm Cannons Disabled for Hurricane II
Ace Pilot = 20 Points
Ace Pilot Kills = 20 Points
So for example if an Ace Pilot is shot down they are worth 20 points to the other side. Like wise, every victory an Ace Pilot lands they will be rewarded 20 points.
FRAME 2: George Kiser (P-40E) – Kiser came into the Dutch East Indies campaign with 2 kills already under his belt from the Japanese attack on the Philippines. Kiser and the 17th Pursuit Squadron would take their P-40Es from Australia to Java, arriving on January 25th. Kiser would add three more victories making him the first Ace of the 17th PS. He would go onto score more 9 more victories in P-40s and fly another combat tour in P-47s with the 9th Air Force. Kiser rose to the rank of Major and passed away in 1991.
FRAME 3: Ivon Julian – (Hurricane II) – Julian was born in New Zealand and joined the RAF in 1940. He was posted to 232 Squadron and flew his Hurricane II off the Indomitable to replenish the Singapore defenses. Julian flew from Singapore, Sumatra and finally Java in mid-February. He was promoted to command 242 squadron after higher ranking officers were withdrawn to Australia. Julian shot down 5 enemy aircraft and damaged and several others including 1 destroyed on the ground. When Java was captured he became a prisoner for the remainder of the war. He was awarded the DFC in 1946 after his return home. He passed away in New Zealand in 1999.
AXIS:
FRAME 1: Hiroshi Onozaki – Ki-43-II – Onozaki was a veteran of the Manchurian campaign but failed to see combat. He was then transferred to South East Asia for the start of the Pacific war where he would see his first action and his first kill over Malaya in December of 1941. He was the top ace of the 59th Sentai and claimed 8 Hurricanes and a Bristol Blenheim over Java. Onozaki would serve in New Guinea and be evacuated due to illness. He survived the war as an instructor in with a total of 14 kills.
FRAME 2: Sadaaki Akamatsu – A6M2 – Akamatsu was already an 11 victory ace in China when the Pacific War broke out. He participated in the initial attacks on Clark Field and claimed several damaged and shared aircraft in the Philippines campaign. From there he would fight in the Dutch East Indies scoring victories over Surabaya. He also participated in the raid on Darwin. Akamatsu would go on fighting all the way to the end in the defense of Japan. He was credited with 27 victories at wars end. Akamatsu passed away in 1980.
FRAME 3: Junichi Sasai – A6M2 – Sasai was part of the infamous Tainan Air Group and saw action first in the Philippines on the raid to Luzon but was forced to abort due to engine troubles. The Tainan AG then headed to Java where Sasai saw considerable action claiming a Buffalo and P-40E of the 17th PS. Sasai would not become an ace until May of 1942 while fighting in the Solomons. Sasai would be recognized for 27 aerial victories although he personally claimed 54. Sasai was killed on August 26, 1942 on a mission to attack Guadalcanal.
- Icon Range – Friendly 3k, Enemy 3k.
- No Radar
- Fighter and Bomber Warning Range - 79200 (15 miles)
- Tower Range – 79,200 (for display to match the above Fighter and Bomber Warning)
- External view for bombers (F3) - On
- Friendly Collisions - Off
- Enemy Collisions - On
- Kill Shooter - Off
- Fuel - 1.0
- Ack - 0.2
- Formations - Enabled
- Time:
- Winds - None
Designed by Nefarious