- Details
- Written by: Devil5O5
- Category: Pacific Theatre
- Hits: 40
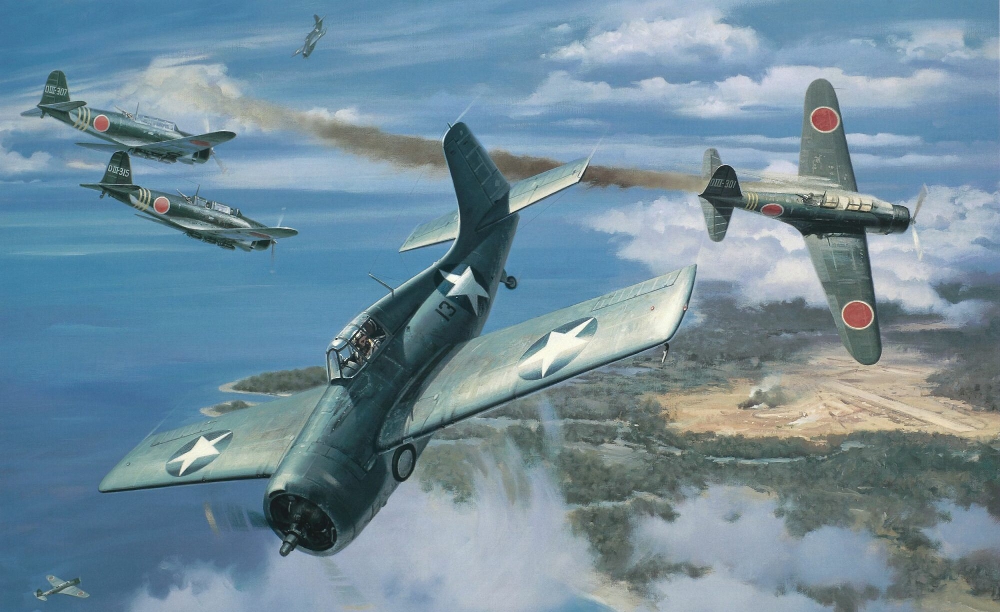
During early July 1942, Allied intelligence discovered that the Japanese Navy began constructing a significant airfield near Lunga Point on Guadalcanal island. After completion, this base would threaten Allied supply and communication lines across the South Pacific to Australia and New Zealand. Allied strategists saw an opportunity to turn the tables on the Japanese by capturing the airfield at Guadalcanal and using it to attack Japanese positions throughout the Solomon Islands. Guadalcanal was given the codename of “Cactus”.
On August 7, the First Marine Division landed on Guadalcanal at Lunga Point, capturing the uncompleted Japanese airfield. The Allies continued construction on the airfield immediately using captured Japanese equipment. The airfield was renamed Henderson Field, for Major Lofton R. Henderson, the first Marine Corps pilot killed during the Battle of Midway.
On August 20th, the first Marine aircraft arrived at Henderson Field; F4F Wildcats of VMF-223 and SBD Dauntless dive bombers of VMSB-232. They began combat operations the following day. They were joined on August 22nd by the P-400s (export versions of the P-39D) from the U.S. Army's 67th Pursuit Squadron. These units formed the backbone of what was dubbed the “Cactus Air Force”. They were reinforced in the following weeks by more USN and USMC squadrons of Wildcats, Dauntlesses, and Avengers. But spare parts were in short supply and the groundcrews often resorted to cannibalizing good parts from damaged planes to keep the working planes in order.
Once the Japanese discovered that the Americans began using Guadalcanal as their own base, air attacks began in ernest. The Japanese force primarily consisted of G4M ‘Betty” bombers from the Misawa and 4th Air Groups with A6M “Zeke” fighters from theTainan K?k?tai based at Rabaul. Between August 21st and September 14th, the Japanese raided Guadalcanal a total of thirteen times, losing 54 aircraft, primarily due to the defensive efforts of Cactus Air Force fighter planes. Most of the Japanese aircrewmen in the destroyed aircraft were killed. Over this same period, the CAF squadrons lost 37 aircraft with 16 pilots killed.
As these daytime Japanese attacks continued through October, they were also punctuated by nighttime bomber raids and shelling from Japanese warships. On the evening of October 13th, the Japanese Battleships Kong? and Haruna sailed into Ironbottom Sound and proceeded to shell Henderson Field with 14 inch shells. After the 90 minute bombardment, 41 Americans were killed, and the Cactus Air Force possessed only five SBDs and seven Wildcats that were still operational in the morning.
The CAF got their first crack at a Japanese battleship on November 15th, after the first night of the Naval Battle of Guadalcanal, in which Hiei's steering was disabled. Unable to flee, Hiei was repeatedly attacked by aircraft from Henderson Field. After suffering numerous direct hits, and being set ablaze, the Hiei was scuttled by the Japanese. This defeat resulted in Japan deciding that it was no longer feasible to support their ground troops on Guadalcanal.
In late November, the CAF received its first international unit when the Royal New Zealand Air Force’s No. 3 Squadron arrived with their Lockheed Hudson bombers. It was now time for the Allies to go on the offensive in the Solomons.
This FSO will recreate the air battles for Guadalcanal in 1942.
Side Split: Allies 50% / Axis 50%
|
Cactus Air Force |
Imperial Japanese Navy |
Frame 1 (Raids on Henderson Field)
Initial Sortie Aircraft
|
F4F-4 |
No min / No max |
A6M3 |
Max 16 |
|
P-39D (20mm) |
Max 16 |
A6M2 |
No min / No max |
|
SBD-5 |
Min 6 |
G4M |
Min 9 |
Subsequent Sortie Aircraft
|
F4F-4 |
A6M2 |
|
SBD-5 |
G4M1 |
|
B5N2 |
|
|
D3A1 |
Frame 2 (Convoy Attacks)
Initial Sortie Aircraft
|
F4F-4 |
No min / No max |
A6M3 |
Max 16 |
|
P-39D (20mm) |
Max 16 |
A6M2 |
No min / No max |
|
SBD-5 |
Min 6 |
B5N2 |
Min 4 |
|
TBM-3 |
Min 4 |
D3A1 |
Min 6 |
Subsequent Sortie Aircraft
|
F4F-4 |
A6M2 |
|
SBD-5 |
B5N2 |
|
TBM-3 |
D3A1 |
Frame 3 (Kahili Airfield, Buin Raids)
Initial Sortie Aircraft
|
F4F-4 |
No min / No max |
A6M3 |
Max 16 |
|
P-39D (20mm) |
Max 16 |
A6M2 |
No min / No max |
|
RNZAF Hudson (B-25C sub) |
Min 9 |
Ki-43 |
Min 6 |
Subsequent Sortie Aircraft
|
F4F-4 |
A6M2 |
|
RNZAF Hudson (B-25C sub) |
Ki-43 |
|
SBD-5 |
Ordnance Restrictions:
- All bombs will be disabled on the A6M2, A6M3, F4F-4, Ki-43, and P-39D.
- P-39D’s will only have the 20mm cannon option to represent a P-400.
- B5N2 limited to the 2x 250kg bomb load or a torpedo.
- TMB-3 limited to only the torpedo for playability purposes.
- SBD-5 limited to the 500lb centerline bomb and the 2 100lb x wing bombs.
- Straffer noses disabled on the B-25C.
- B-25C’s are limited to the 8 x 250lb bomb load.
- G4M1’s are limited to the 4x 250kg bomb load.
Event Rules and Clarifications
- Alt Cap is 20K for fighters, 16K for all bomb/rocket carrying aircraft.
- Level bombers may not descend below 8K unless for landing/ditching.
- Hour 1 target areas must be bombed before T+60 and Hour 1 targets become invalid after T+60.
- Hour 2 targets are only valid for pilots launching a new sortie in Hour 2 or rearming their Hour 1 plane after T+60.
- Air spawn locations will be shown on the objective maps if used. Air spawn altitudes will be 5K.
- The SBD-5’s in Frame 1 are to be used as fighters/scouts. There is no attack objective for the Allies that frame.
- Base A8 will be set to Rook as there was no air base there during the battle for Guadalcanal.
- Fighters may not strafe down target objects. Only level bombers, dive bombers, and torpedo bombers will score points for destroying target objects.
- Target fleets will be placed as close together as possible and follow a fixed track for the entire frame. The tracks will be shown in the objectives.
- Ship Hardness:
- Destroyers = 1000 pounds.
- Cruiser = 3,000 pounds
- Battleships = 6,000 pounds
- In Frames 1 and 3, the attacking side must assign at least 12 pilots to fighter escort / fighter sweep missions.
- In Frame 2, each side must assign at least 9 pilots to defense.
- Any non-target object that is destroyed will be restored at the earliest convenience by a CM.
- Scoring values will be reduced in Hour 2 to compensate for an increased sortie rate. Aircraft on their first sortie will always score full points against enemy aircraft even after the second hour begins. A player's first sortie ends once they rearm, land, or are shot down. This is to prevent a situation where a last minute strike in Hour 1 can award full bombing points while only risking 1/4 points for a death on the way home.
Scoring
|
Fighters (Including SBD-5’s in Frame 1) |
4 (1 in Hour 2) |
|
Bombers (B-25C and G4M1) |
6 (2 in Hour 2) |
|
Dive / Torpedo Bombers |
4 (1 in Hour 2) |
|
Hangars |
24 (6 in Hour 2) |
|
Bunkers (Barracks, Ord, Fuel, Radar), |
6 (1 in Hour 2) |
|
Destroyers |
12 (3 in Hour 2) |
|
Cruisers |
36 (9 in Hour 2) |
|
Battleships |
72 (18 in Hour 2) |
Arena Settings
- Terrain: solomons
- Fuel Burn: 1.0
- Icons: 3K Friendly/Enemy for aircraft.
- Ack: .3
- Fighter and Bomber warning range: 63360 (about 12 miles)
- Tower range set to 63360 (for display only to match the above setting)
- Haze/Fog: 15 miles
- Radar: Off
- Enemy collisions: on
- Friendly collisions: off
- Killshooter: off
- Time: 1100 (11AM) Game Clock
- Clouds: light5k
- Wind: 0K-2K NO WIND
2K-12K: NW TO SE - Speed 5
12K-16K: NW TO SE - Speed 10
16K+: 45MPH downdraft
- Details
- Written by: Spikes
- Category: Pacific Theatre
- Hits: 23
August 6th, 1945: The United States drops an atomic bomb on Hiroshima, the "Little Boy".
August 9th, 1945: The United States drops a second atomic bomb on Nagasaki, the "Fat Man".
Just three days after the United States devastated Japan with the use of an atomic bomb, the Soviet Union invades Japanese-held Manchuria. The Soviet Union had multiple armies that were able to attack the Japanese from all sides. From the East pushed the 1st Far East Front, from the north, the 2nd Far East Front, and from the west, the Transbaikal Front. Each force had a full complement of tanks, artillery, and aircraft support for their respective objectives.
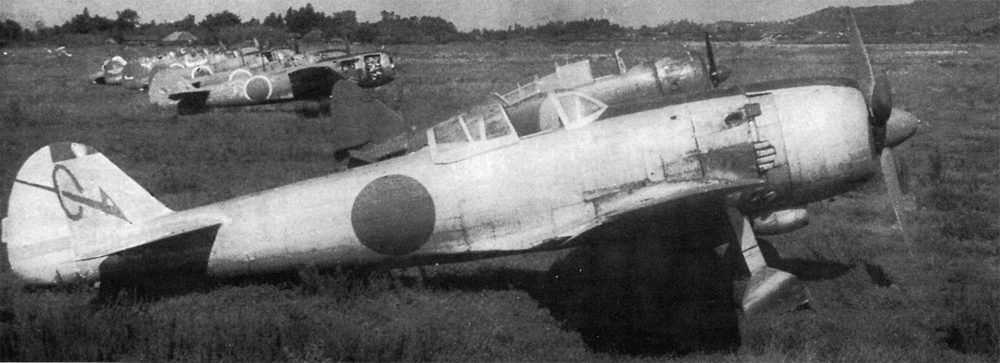
Defending against the Soviets was the Kwantung Army of the Imperial Japanese Army. While the Kwantung army had a large force of men and a decent sized force of tanks, artillery, and aircraft, it proved to be no match for the overwhelming force of the Soviet Union. In a classic pincer move, the Soviets swept into Manchuria from all directions. The invasion lasted a total of 12 days and was the last major battle of World War II.
This FSO is set to depict the very late-war brawl between the Soviet Union and Japan.
Allies: 50% / Axis 50%
Order of Battle | Frame 1:
|
VVS |
IJAAF |
||
|
La-7 |
MAX 6 |
N1K2-J |
|
|
La-5FN |
Ki-84 |
||
|
Yak-9U |
Ki-61 | MIN 8 | |
|
Tu-2S |
MIN 8 | ||
Order of Battle | Frame 2:
|
VVS |
IJAAF |
||
|
La-7 |
MAX 6 |
N1K2-J |
|
|
La-5FN |
Ki-84 |
||
|
Yak-9U |
Ki-67 | MIN 8 | |
|
Yak-9T |
MIN 8 | ||
Order of Battle | Frame 3:
|
VVS |
IJAAF |
||
|
La-7 |
MAX 6 |
N1K2-J |
|
|
La-5FN |
Ki-84 |
||
|
Yak-9U |
Ki-61 | MIN 8 | |
|
Tu-2S |
MIN 8 | ||
Loadout Restrictions:
Fighters may not carry bombs.
Tu-2S limited to 2x 500kg internal bombs.
Notes:
- Bomber Alt Cap is 12K.
- Fighter Alt Cap is 16K.
- La-7 will be disabled after initial takeoff.
- Minimums apply to Sortie 1.
Scoring:
- Fighters - 2
- Bombers - 2
- Hangars - 5
- Bunkers - 1
- Town (t+60) - .25
Arena Settings:
- - Terrain: mnchuria
- - Clouds: med15kmed5k
- - Fuel Burn: 1.0
- - Icons: 3K Friendly/Enemy
- - Ack: .3
- - Fighter and Bomber warning range: 63360 (about 12 miles)
- - Tower range set to 63360 (for display only to match the above setting)
- - Haze/Fog: 15 miles
- - Radar: Off
- - Enemy collisions: on
- - Friendly collisions: off
- - Killshooter: off
- - Time: 1000 (10AM) Game Clock
- - Formations: On
- - Formation Autopilot: On
- - Bomber calibration: Automatic
- - Wind: 0K-6K NO WIND
- 6K-10K: E TO W - Speed 2
- 10K-16K: SE to NW - Speed 5
- 16K+: 45MPH Downdraft
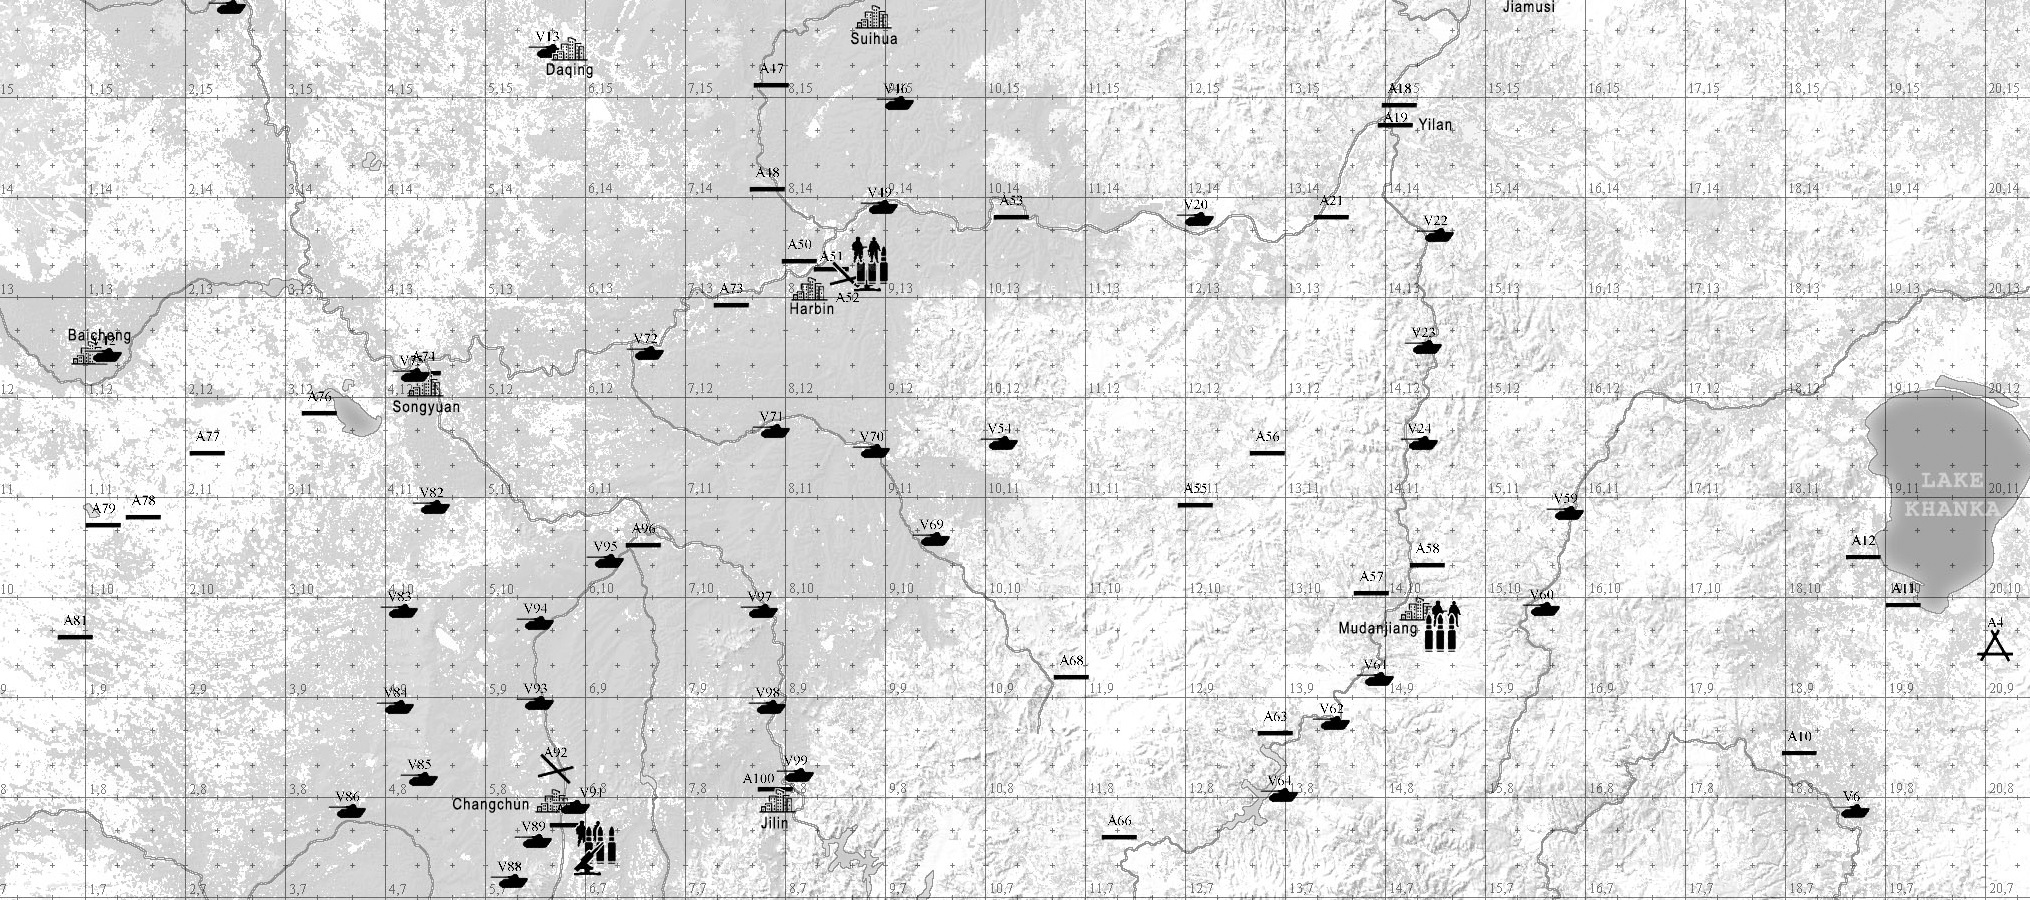
Area of Operations:
- Details
- Written by: Spikes
- Category: Pacific Theatre
- Hits: 25
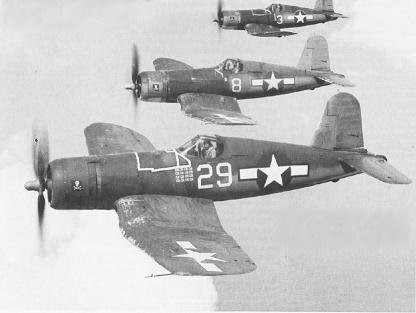
As 1944 came to a close in the Philippines, the U.S. Army was still locked in bitter fighting on Leyte. A second landing at Ormoc on December 7th cut off the remaining Japanese forces from resupply, yet resistance persisted for months. Just a week later, U.S. Sixth Army units came ashore on Mindoro to secure sites for airfields intended to support the drive on Manila, where MacArthur aimed to fulfill his promise to return. On January 9th, he landed Sixth Army troops at Lingayen Gulf to begin the liberation of Luzon.
In these final months of 1944, Marine Air Group 12 moved to Leyte under Fifth Air Force command, joining Army Air Forces P-38s, P-47s, and Marine F4Us—as well as supporting bombers—to defend the invasions, strike Japanese positions, and interdict shipping and air attacks. These operations produced some of the fiercest air battles of the Philippine campaign, fought across Leyte, Mindoro, and Luzon as Japanese losses soared and replacements dwindled. This FSO centers on those climactic battles and the Allied landings in late December 1944 and early January 1945.
Allies: 52% / Axis 48%
Order of Battle | Phase 1:
|
USAAF |
IJAAF |
||
|
P-47D-40 |
Ki 84 |
MAX 8 |
|
|
P-38L |
Ki 61 |
||
|
F4U-1A |
MAX 12 |
N1K2J |
MAX 8 |
|
B-24J |
|||
Order of Battle | Phase 2:
|
USAAF |
IJAAF |
|
P-47D-40 |
Ki 61 |
|
P-38L |
N1K2J |
|
B-24J |
Loadout Restrictions:
P-38s, F4U-1As, and Axis fighters have bombs and/or rockets disabled.
P-47D-40s have 500lb bombs enabled at t+30, no bombs prior to t+30. Rockets are disabled.
Notes:
Flight re-opens at t+30
Fighter alt cap 20K
Bomber alt cap 16K
Scoring:
Fighters – 1
B-24s – 2
Hangars – 20
Bunkers - 5
Arena Settings:
- - Terrain: luzon
- - Fuel Burn: 1.0
- - Clouds: light5k
- - Icons: 3K Friendly/Enemy
- - Ack: .3
- - Fighter and Bomber warning range: 63360 (about 12 miles)
- - Tower range set to 63360 (for display only to match the above setting)
- - Haze/Fog: 15 miles
- - Radar: Off
- - Enemy collisions: on
- - Friendly collisions: off
- - Killshooter: off
- - Time: 0800 (8AM) Game Clock
- - Formations: On
- - Formation Autopilot: On
- - Bomber calibration: Automatic
- - Wind: 0K-2K NO WIND
- 2K-16K: E TO W - Speed 5
- 16K-20K: SE to NW - Speed 10
- 20K-26K: NE to SW - Speed 15
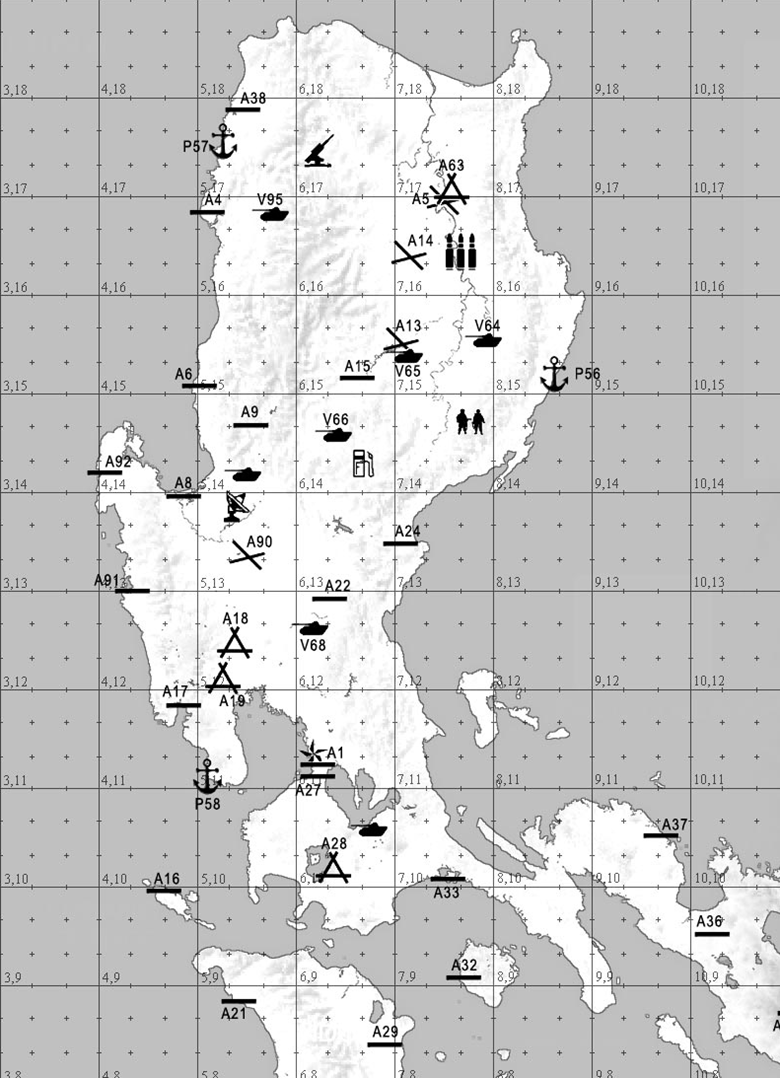
Area of Operations:
- Details
- Written by: Spikes
- Category: Pacific Theatre
- Hits: 19
Introduction
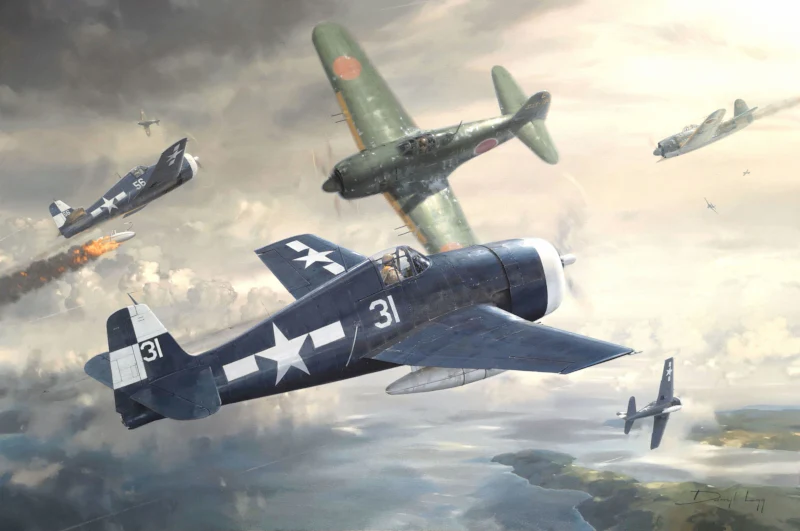
The Pacific War was nearing its close. The Japanese were now being defeated on every front and rapidly falling back to the Japanese home islands. The IJF's last stand to avert the inevitable invasion of the home island of Japan was Okinawa. The Japanese would put every available man and boy into the battle to buy time before the final invasion.
The Japanese were opposed by the formidable US Industrial juggernaut, the United States Navy Pacific Fleet Task Force 50. By itself, the US Fleet was composed of 7 fleet carriers, 6 light carriers, 18 escort carriers, 8 fast battleships, 10 old battleships, 14 heavy cruisers, 17 light cruisers, 132 destroyers, 45 destroyer escorts. The number of aircraft available for operations to the fleet was between 500 and 1,100 offensive aircraft. The Americans had the capability of sending out 175 aircraft to one objective.
But as had been throughout the war, the Japanese would not go quietly into the night in defeat. The Japanese Divine Wind would save Japan as it did against the Mongols and Kublai Khan in 1274. The volunteer pilots of the two Typhoons would destroy the spirit of the Americans and send them into retreat for their lives. Whereas the Kamikazes did not avert the fall of Japan, they did account for a list of 147 ships damaged, destroyed, or sunk, including the deaths of 4582 combatant sailors. The effort was admirable, but it was also too late.
Join the FSO community for the fast-paced, hard-hitting battle of agony and defeat in the Battle of Okinawa.
Side Split
50/50
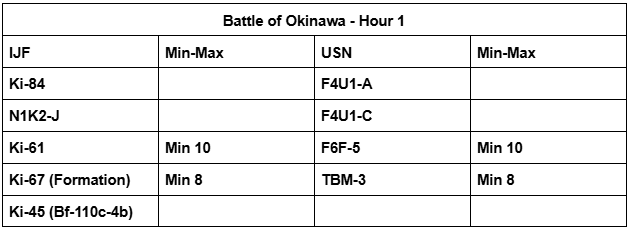
Plane Set
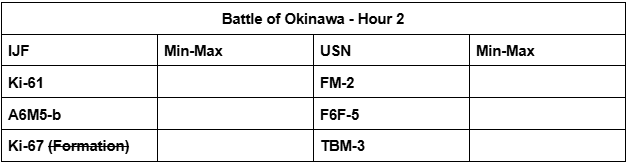
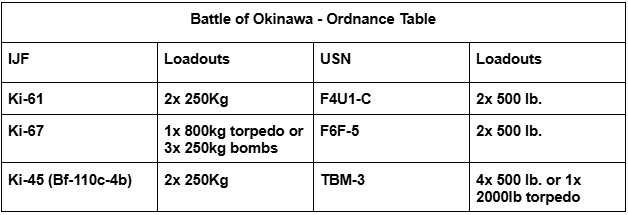
Ordnance Table
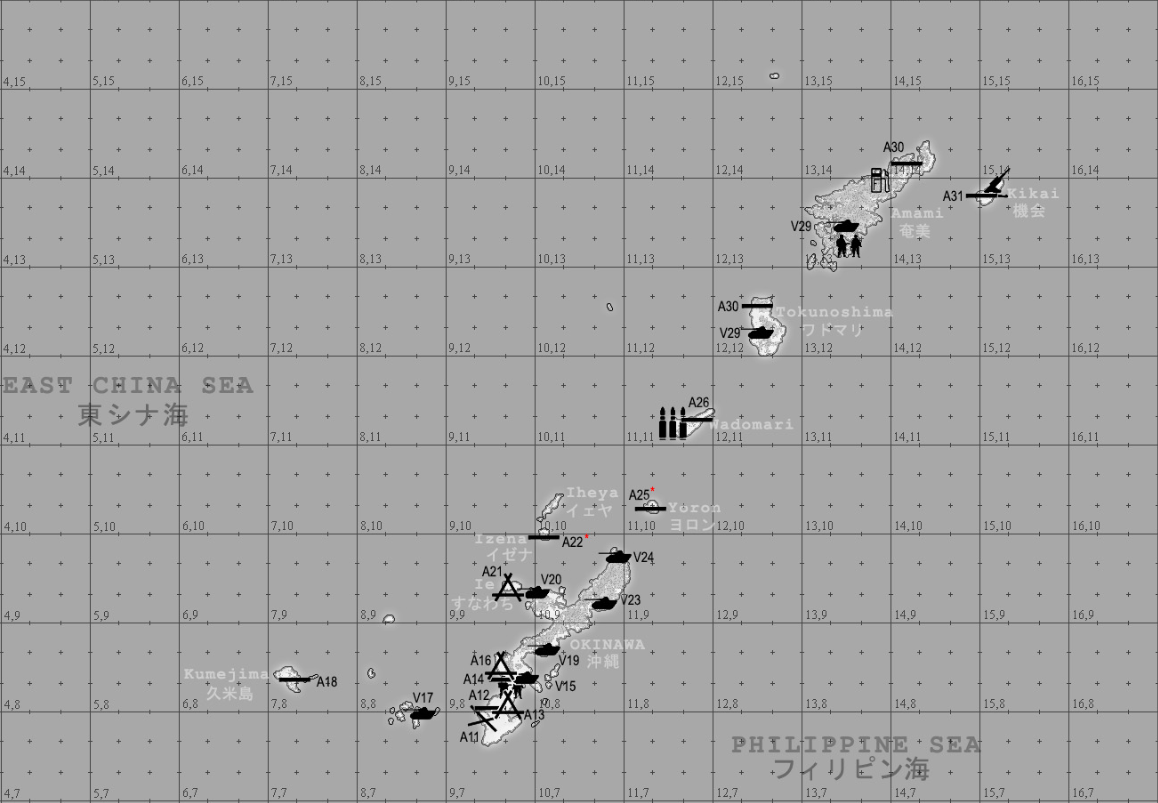
Map
Victory Conditions
This is an objectives-based event. Objectives will be established for each side to complete.
The side that completes the most objectives in the first and second hours will win the frame.
The result of both sides completing all of the assigned objectives will be a draw between the sides.
The side that destroys the most hangars or ships within each hour wins the hour.
If one side wins the first hour and the other side wins the second hour, the result is a draw.
If both sides destroy the same number of hangars or ships within each hour, the result is a draw.
If the numbers match all around, it will be a draw.
Scoring Scenario
If one side completes its objectives in the first hour and the other side does not, the side that did not complete its objectives in the first hour can tie the frame in the second hour by completing the second-hour objectives, that is, if the opposite side doesn’t complete its objectives.
If the objectives were not completed in the first hour by either side or the second hour, the frame would be a draw.
Special Event Rules
This is a multi-life event. Pilots may re-plane in 2nd-hour aircraft once aircraft become available in the hangar after the first 30 minutes of play.
- Ordnance for each aircraft will be set by the setup CM in the hangar.
- The attackers will have T+60 to make their initial attack.
- Fighters are allowed to attack ground targets.
- Second-hour targets may not be attacked in the first hour and vice versa.
- The bomber alt cap will be 14k.
- The fighter alt cap will be 20k.
- Destroyed targets are down for the remainder of the frame.
- All active fields or fleets can be used at any time during the two hours of play.
- All CiCs are required to comply with the stated number of aircraft allocations per frame.
- All ships and hangars will have the same destruction weight of 3,000 lbs.
Arena Settings
Terrain map: Okinawa
Fuel burn rate: 1.0
Anti-aircraft gun strength: 0.4
Bombsight calibration: AUTOMATIC (MA standard)
Icons: 3.0K yards (9,000 feet)
Sector Radar ("bar dar"): OFF
Dot Radar: OFF
Fighter and Bomber warning range: 26,400 feet (5 miles)
Tower range set to 26,400 feet (for display only, to match the above setting)
Haze range: 18 miles
Friendlycollisions: OFF
Enemy collisions: ON
Kill shooter: OFF
Stall Limiter: Set ON (Players may disable)
Weather:
Light5kmed15k.awa
Strong UP winds at 20k. +> 100 Mph
- Details
- Written by: Spikes
- Category: Pacific Theatre
- Hits: 23
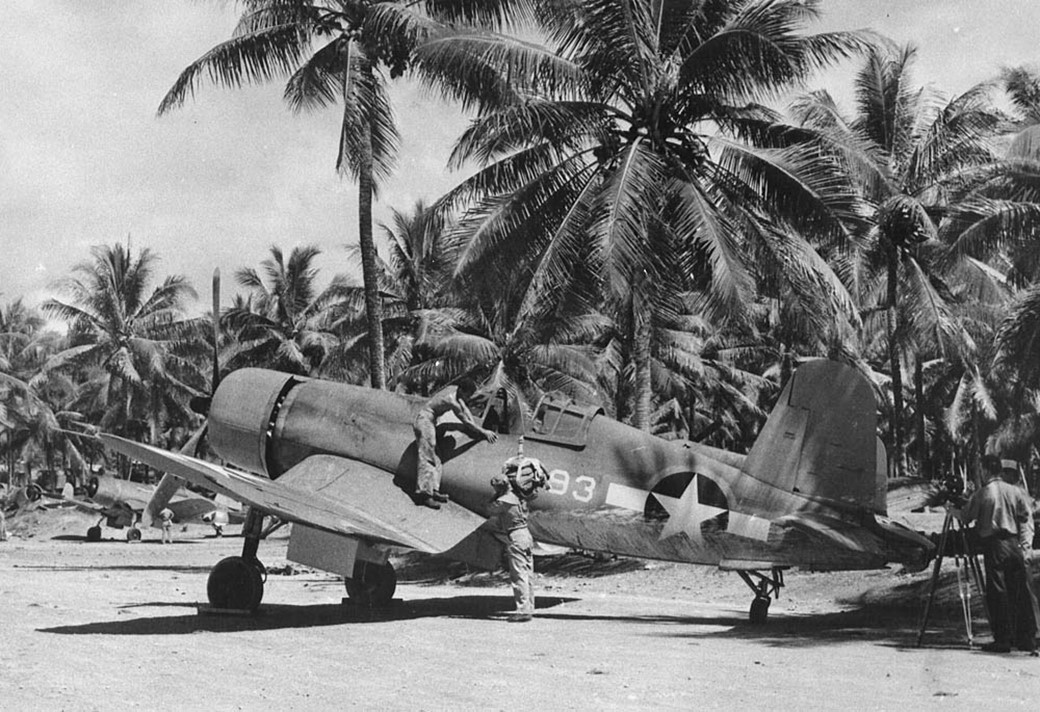
By late 1943, facing mounting Allied victories in the Pacific – particularly in New Guinea and Guadalcanal, and following the devastating defeat at Midway in 1942 – Imperial Japan was compelled to reassess its war strategy. Overstretched across vast territories, Japan recognized the need to consolidate its forces. This strategic contraction aimed to buy crucial time for defensive preparations against the anticipated renewed Allied offensives.
In the Pacific, Admiral Nimitz prepared to invade the Gilbert Islands. General MacArthur continued his advance along the New Guinea coast, supported by Admiral Halsey's forces in the South Pacific, targeting the Bismarck Archipelago. In the Solomons, Halsey's campaign aimed to capture New Georgia and Bougainville, further isolating the vital Japanese stronghold at Rabaul.
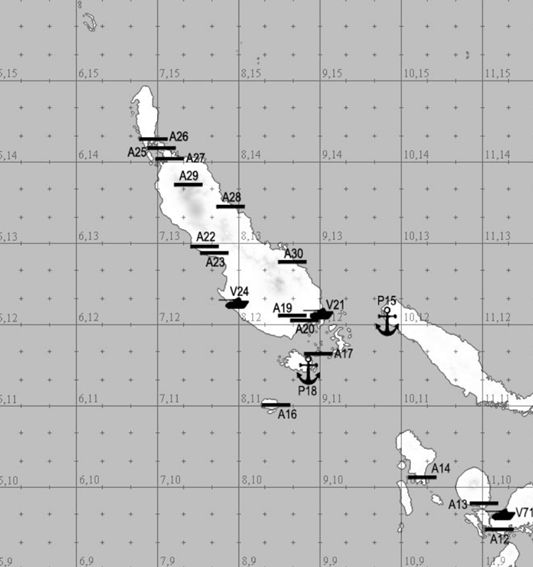
This FSO aims to re-create the fierce battles that happened over control of Bougainville.
Allies: 50% / Axis 50%
Order of Battle:
|
Allies |
Axis |
||
|
P-38G |
MAX 10 |
Ki-61 |
MAX 20 |
|
F4U-1 |
MAX 8 |
A6M5b |
|
|
P-40F |
A6M3 |
||
|
B-25C |
G4M1 |
||
Ordnance Restrictions:
Ordnance disabled on fighters (P-38G, F4U-1, P-40, Ki 61, A6M5b, A6M3).
Notes:
- Fields will re-open at t+30 with Hour 2 aircraft, Hour 2 target is still not valid until t+60.
- Bomber Alt Cap is 12K.
- Fighter Alt Cap is 16K.
- Fighters strafing ground targets will not count toward scoring.
Scoring:
- Fighters - 1
- Bombers – 2
- Hangars – 10
- Bunkers – 2
Arena Settings:
- - Terrain: solomons
- - Clouds: light5k
- - Fuel Burn: 1.0
- - Icons: 3K Friendly/Enemy
- - Ack: .3
- - Fighter and Bomber warning range: 63360 (about 12 miles)
- - Tower range set to 63360 (for display only to match the above setting)
- - Haze/Fog: 15 miles
- - Radar: Off
- - Enemy collisions: on
- - Friendly collisions: off
- - Killshooter: off
- - Time: 1000 (10AM) Game Clock
- - Formations: On
- - Formation Autopilot: On
- - Bomber calibration: Automatic
- - Wind: 0K-2K NO WIND
- 2K-16K: E TO W - Speed 5
- 16K+ - 45mph Downdraft
Area of Operations: